We hope this was helpful! If you have any questions, feel free to leave a comment, open a ticket from your Client Area, or hit us up on Live Chat 24×7.
After reading this KB Article, you’ll be able to add your first IMAP Email Account to the app and also additional accounts.
How to add your first IMAP Email Account to Outlook on Android
Step 1: If you haven’t already downloaded & installed Outlook, you can click here to open the Play Store.
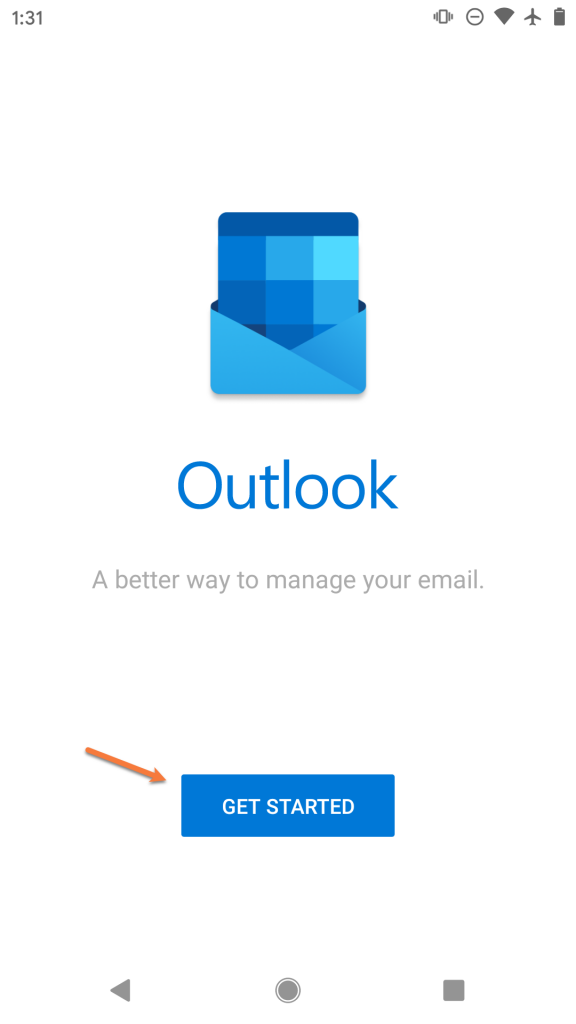
Step 2: The first time you open Outlook, you’ll see a screen like the one below.
Tap Get Started
Step 3: Enter the email address you are adding as [email protected]
Then tap Continue

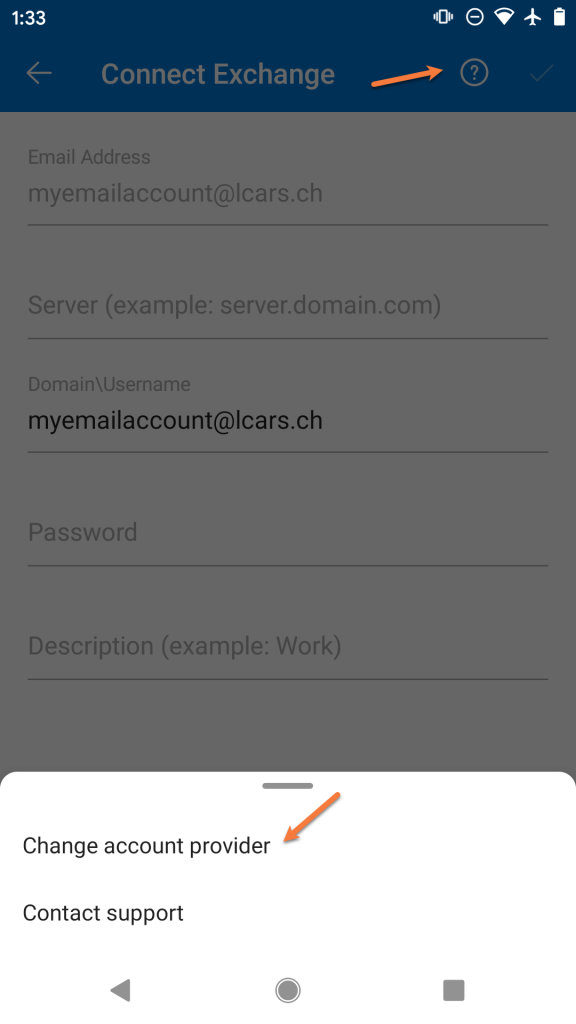
Step 4: Outlook will attempt to help you setup your email account as though you are connecting to a Microsoft Exchange mail server. We’ll need to switch the account type to continue setup.
To do this, tap the? mark in the circle located in the top right corner of the screen. Then tap Change account provider
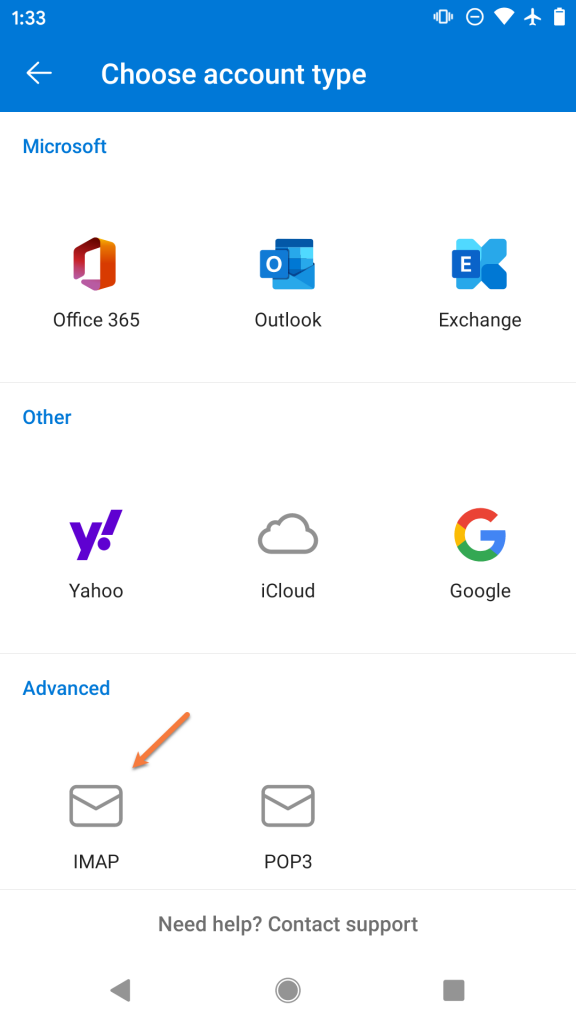
Step 5: Outlook will provide you with a list of common account types. In the 3rd section, tap IMAP to continue.
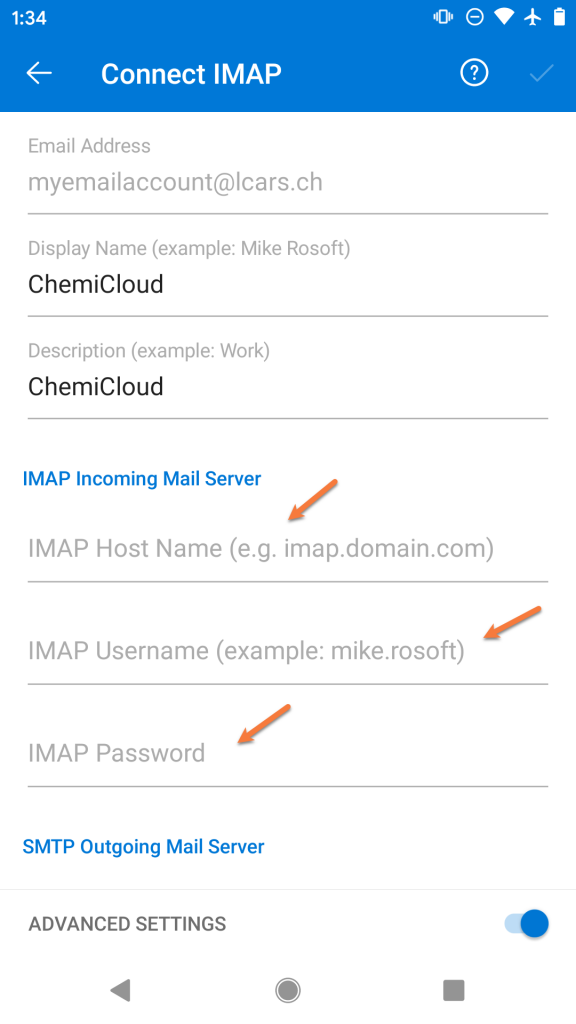
Step 6: On the next screen, you will be prompted to enter the account credentials for this new account.
Enter the password for the email account you are adding.
Next, enter the name you want other people to see when you use Outlook to send mail.
Then, give the account a name so you can easily identify it in Outlook. This is useful if you have multiple accounts setup in Outlook.
Next, tap the toggle in the bottom right to enable the advanced settings.

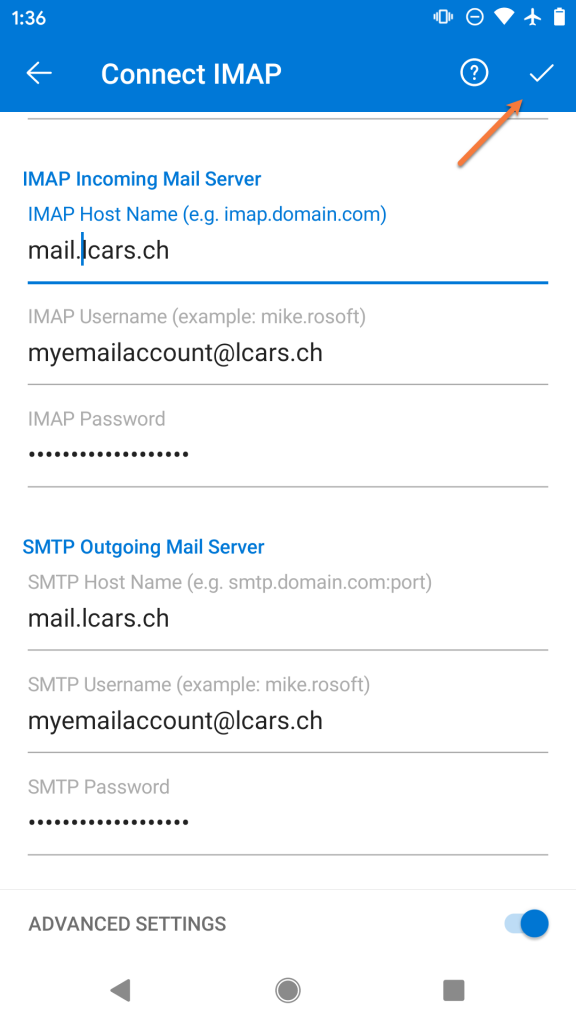
Step 7: We will examine the next screen in 2 parts.
Firstly, we’ll need to enter the incoming IMAP server information. Enter this as mail.yourdomain.tld
Then enter the username for the account you’re adding as [email protected]
And finally, enter the password for the account you are adding.
Next, you’ll need to scroll down so you can enter the SMTP Outgoing Mail Server settings.
Enter mail.yourdomain.tld as the SMTP Host Name
Enter your [email protected] as the SMTP Username
And enter the password for the account you’re adding
To proceed, tap the  mark in the top right corner.
Step 8: That’s it! If the settings you typed are correct, you’ll see a screen like the one below!
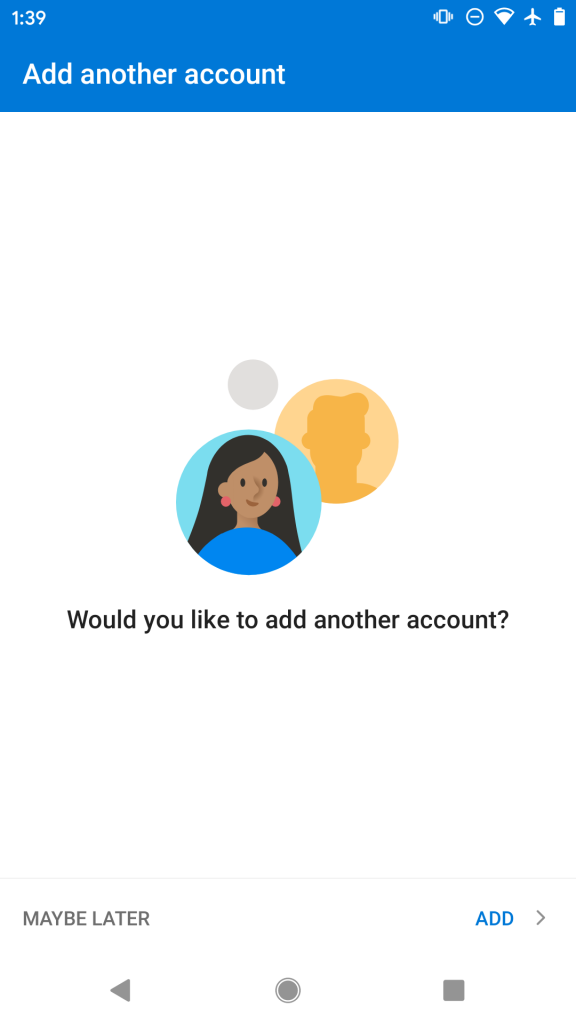
If you want to add another account, you can tap Add or to continue to your inbox, tap maybe later.
Struggling with the Outlook mail client setup? ChemiCloud is the hosting solution designed to save you money and time!  Check out our email hosting plans!
How to add additional IMAP Email Accounts to Outlook on Android
Let’s say it’s been a few weeks since you started using Outlook on Android and you need to add a second email account to the App. This section of the guide will get you sorted!
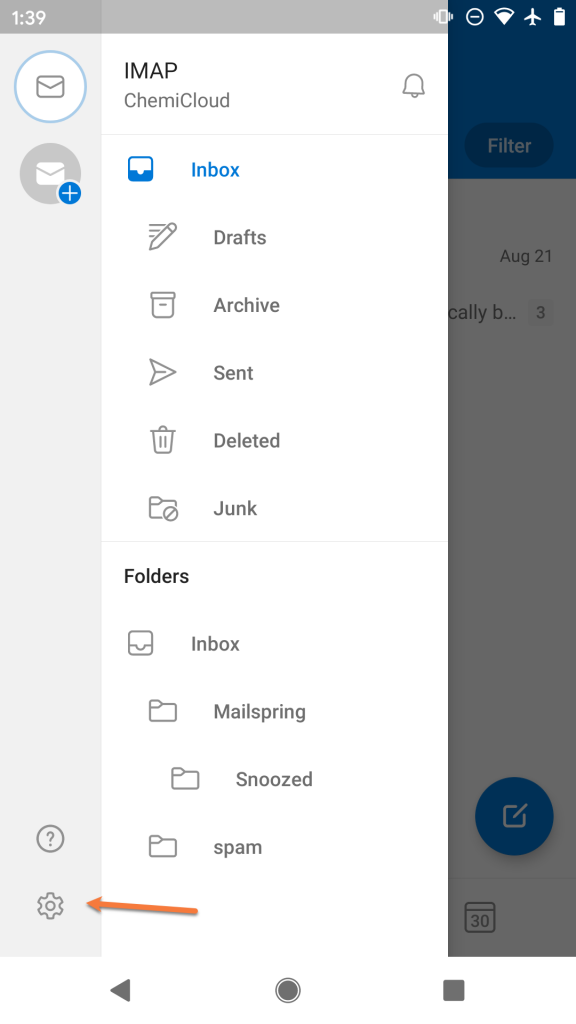
Step 1: Open the Outlook app and tap the  icon in the circle located in the top left of the app.
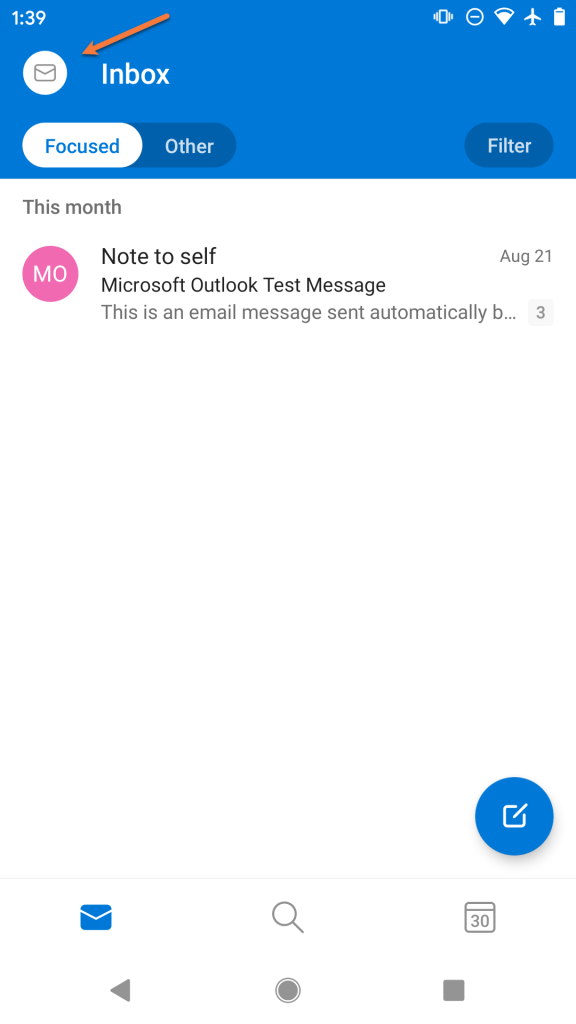
Step 2: Tap the  icon in the bottom left to open the Settings area in Outlook.
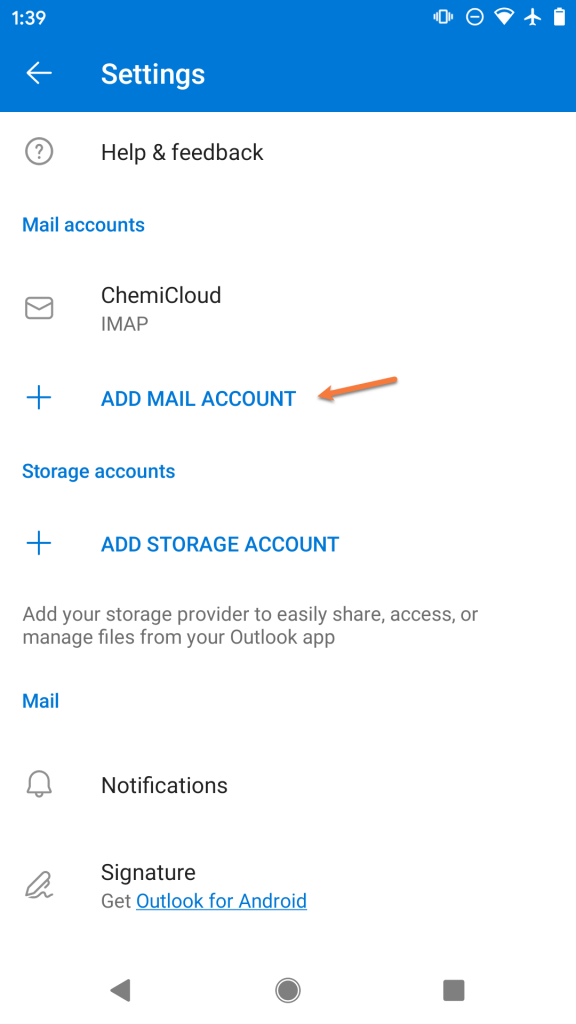
Step 3: Tap Add Mail Account to proceed.
Step 4: Enter the email address you are adding as [email protected]
Then tap Continue
Step 5: Outlook will attempt to help you setup your email account as though you are connecting to a Microsoft Exchange mail server. We’ll need to switch the account type to continue setup.
To do this, tap the ? mark in the circle located in the top right corner of the screen. Then tap Change account provider
Step 6: Outlook will provide you with a list of common account types. In the 3rd section, tap IMAP to continue.
Step 7: On the next screen, you will be prompted to enter the account credentials for this new account.
Enter the password for the email account you are adding.
Next, enter the name you want other people to see when you use Outlook to send mail.
Then, give the account a name so you can easily identify it in Outlook. This is useful if you have multiple accounts setup in Outlook.
Following this, tap the toggle in the bottom right to enable the advanced settings.
Step 8: We will examine the next screen in 2 parts.
Firstly, we’ll need to enter the incoming IMAP server information. Enter this as mail.yourdomain.tld
Then enter the username for the account you’re adding as [email protected]
And finally, enter the password for the account you are adding.
Next, you’ll need to scroll down so you can enter the SMTP Outgoing Mail Server settings.
Enter mail.yourdomain.tld as the SMTP Host Name
Enter your [email protected] as the SMTP Username
And enter the password for the account you’re adding
To proceed, tap the mark in the top right corner.
Step 9: That’s it! If the settings you typed are correct, you’ll see a screen that looks just like the one below!
If you want to add another account, you can tap Add or to continue to your inbox, tap maybe later.
We hope this was helpful! If you have any questions, feel free to leave a comment, open a ticket from your Client Area, or hit us up on Live Chat 24×7.
]]>By the end of this knowledgebase article, you will know how to add an account to Gmail on Android for the very first time, as well as how to add additional email accounts.
Adding your first account to Gmail on Android
Gmail is preinstalled on most Android devices, however if you need to download it, you can click here to open the app on the Play Store and download + install the app.
Step 1: Open Gmail. On most Android devices, you can swipe up from the bottom of your screen to see the app drawer. Alternatively, your device may have a dedicated app drawer icon on the home screen. Or, Gmail may already be on your home screen.

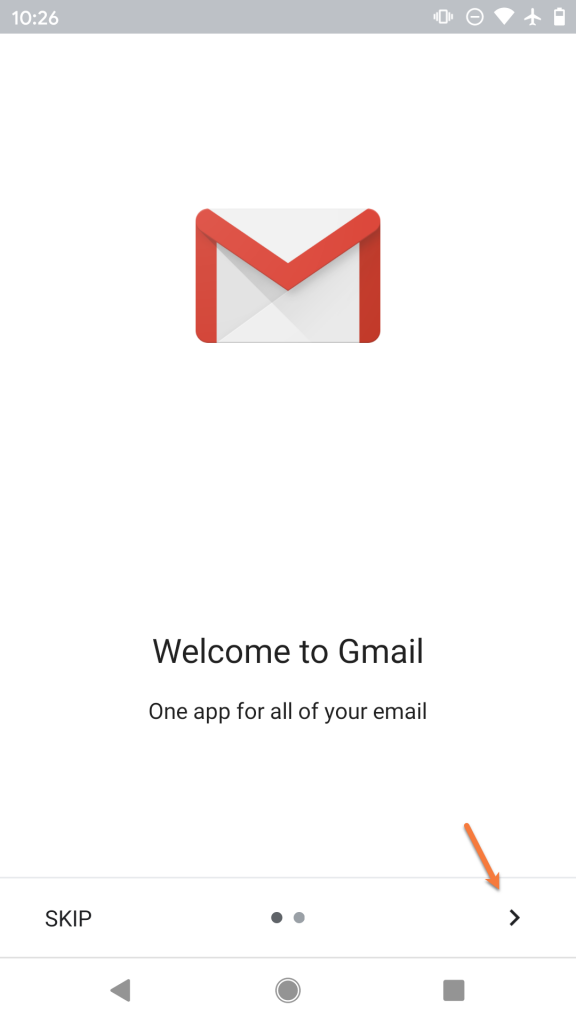
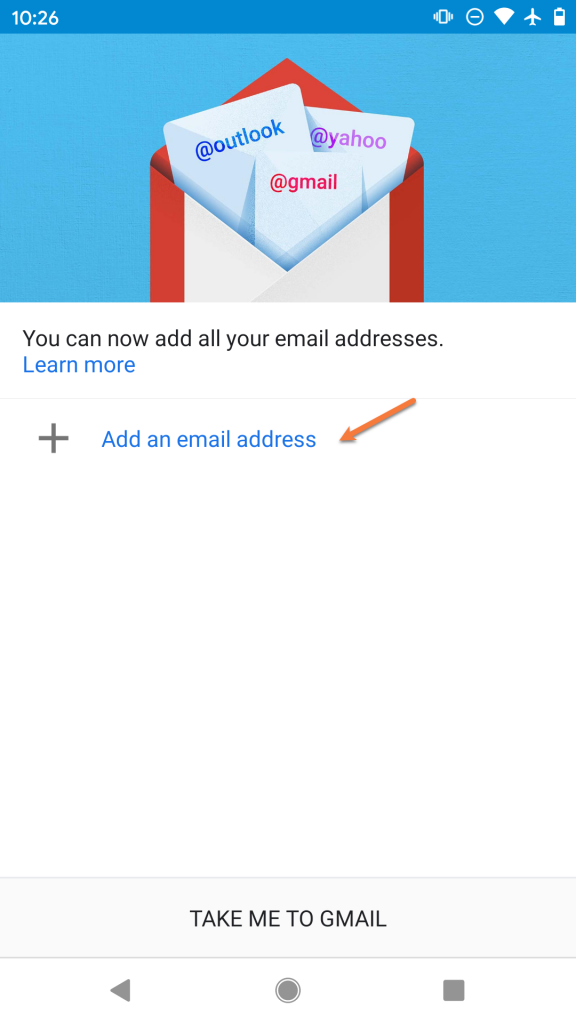
Step 2: The first time you open Gmail on Android, you’ll see a screen like the one below. If you haven’t used Gmail in a while, it might be a great idea to tap the > icon and review some of the new features.
If you’re familiar with Gmail, feel free to tap Skip and move to Step 3.
Step 3: Tap + Add an email address
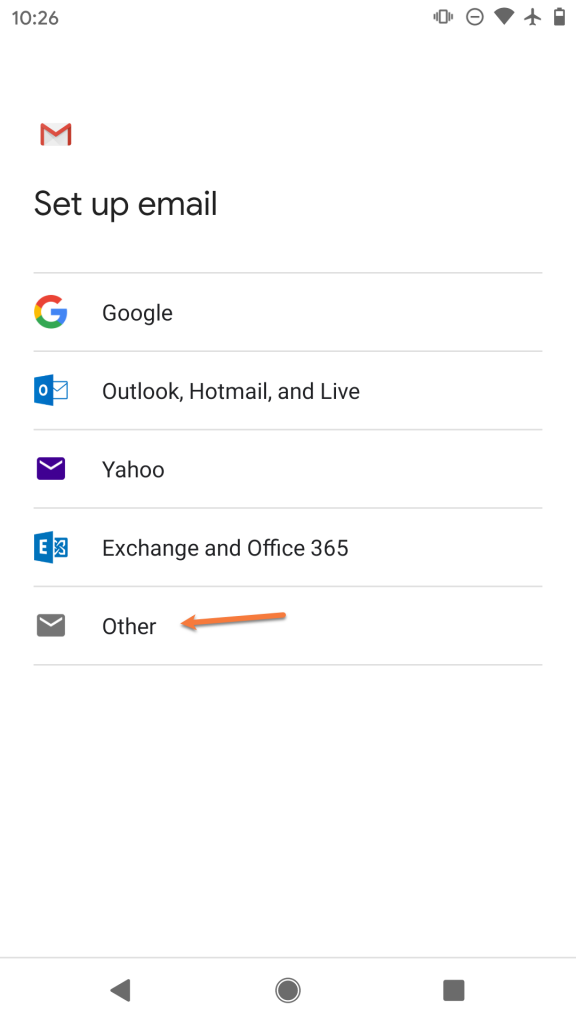
Step 4: From the list of available account options, choose Other.
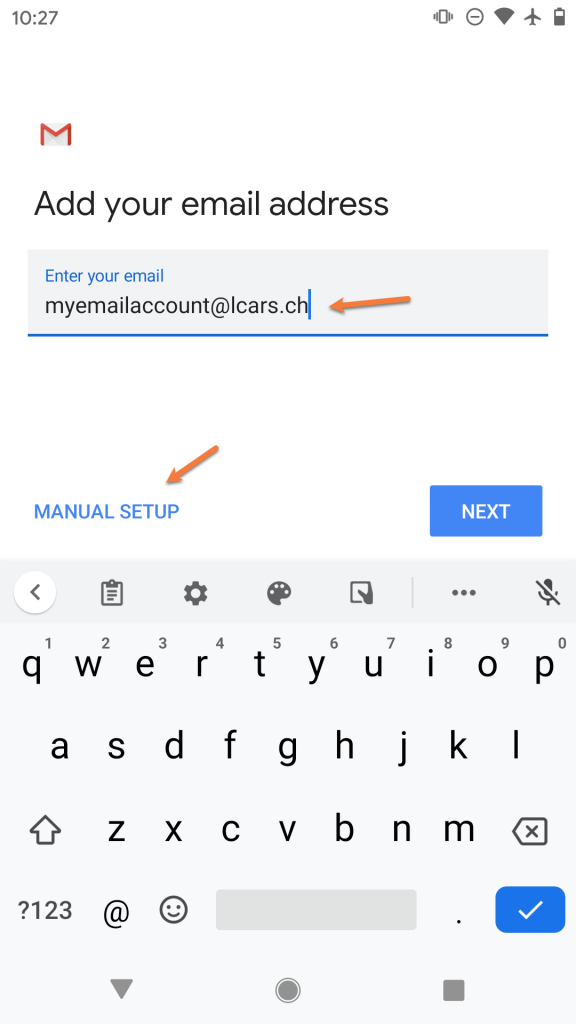
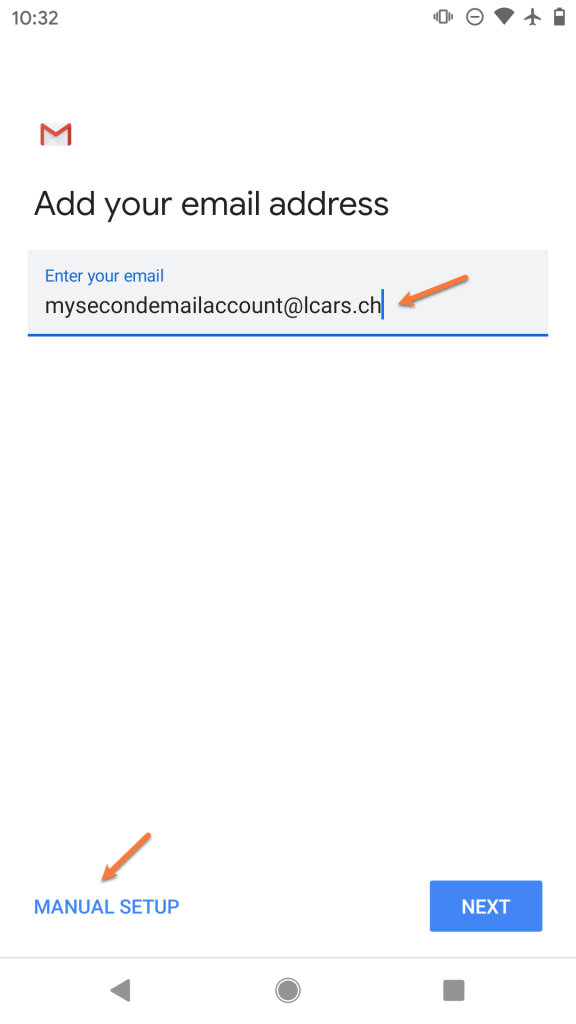
Step 5: Enter the full email address for the account you are adding as [email protected].
Then, tap Manual Setup.
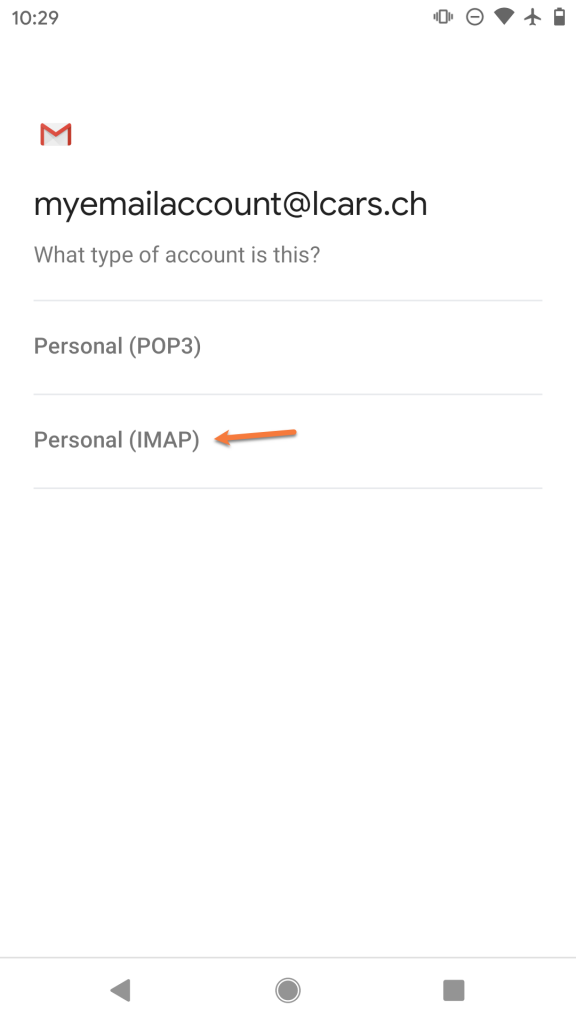
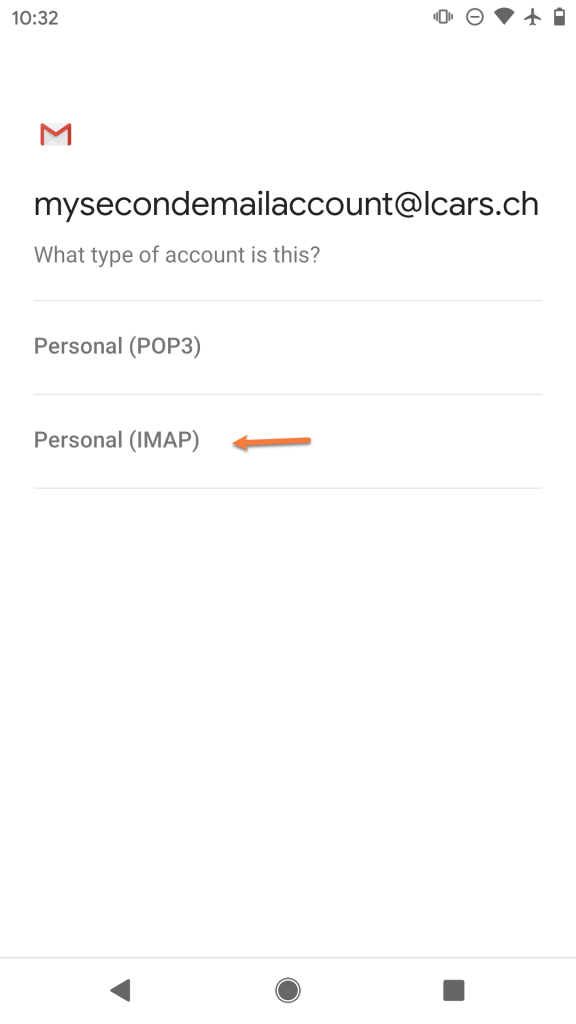
Step 6: Select IMAP from the list of options.
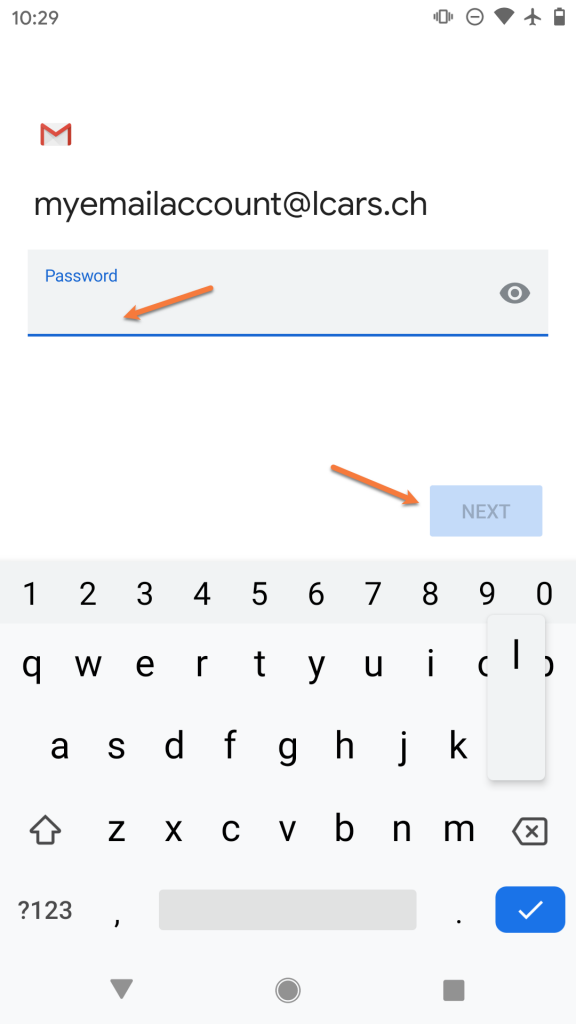
Step 7: Enter the password for the account you are adding. Then, tap Next.
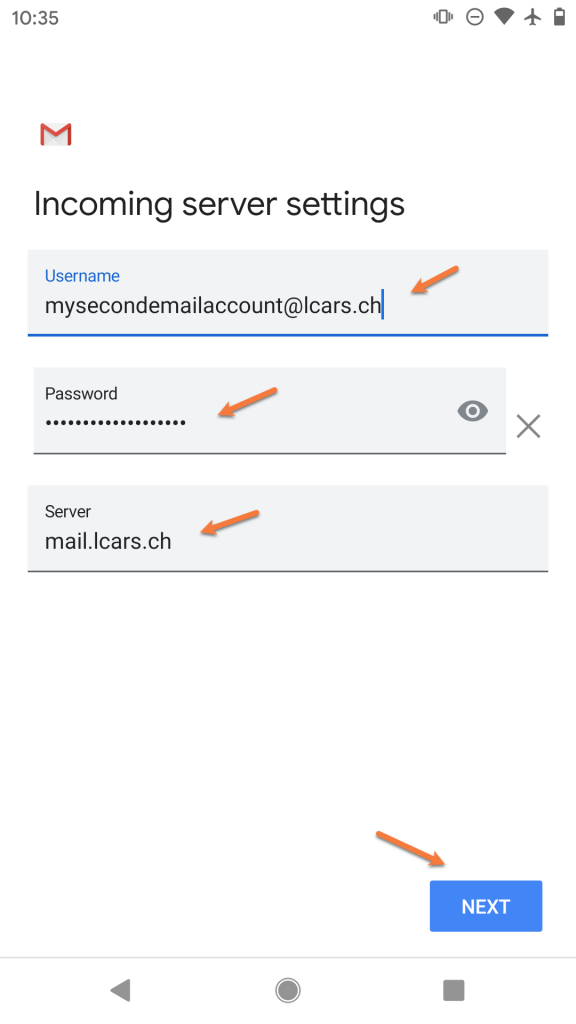
Step 8: On the next screen, ensure your Username and Password are filled in correctly.
In the Server section, enter your server information as mail.yourdomain.tld.
Then, tap Next.

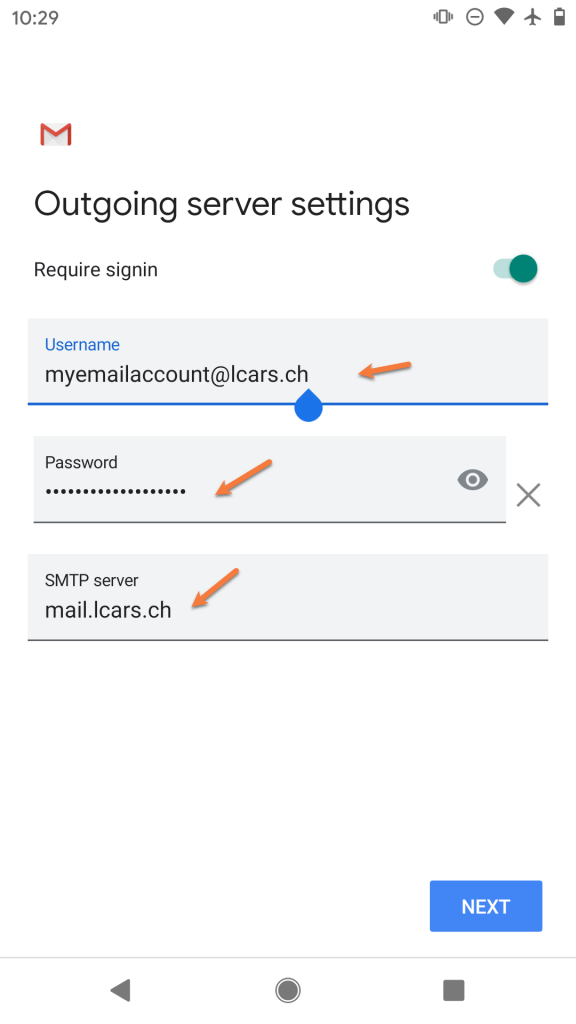
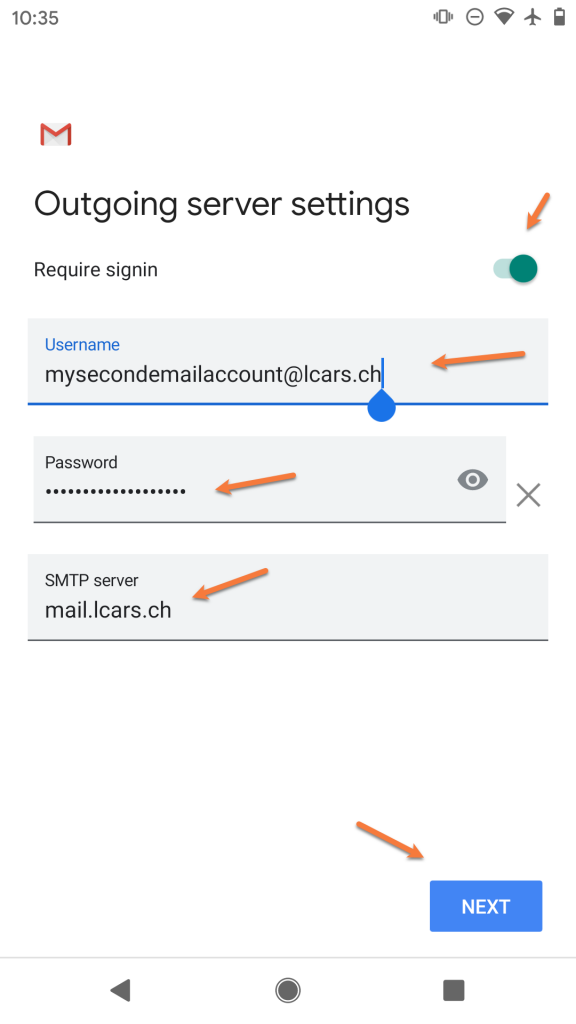
Step 9: On the next screen, ensure the Require signin toggle is slid to the right. Also, check that your Username and Password are filled in correctly.
In the SMTP Server field, ensure the SMTP Server is set to mail.yourdomain.tld
Then, tap Next
Step 10: You’ll briefly see a screen saying Verifying Account Information and then, if the information you entered was correct, you’ll see a screen like the one below:

Feel free to change any of these settings, but leave Sync email for this account checked if you wish to be able to send/receive email on this device.
Tap Next when ready.
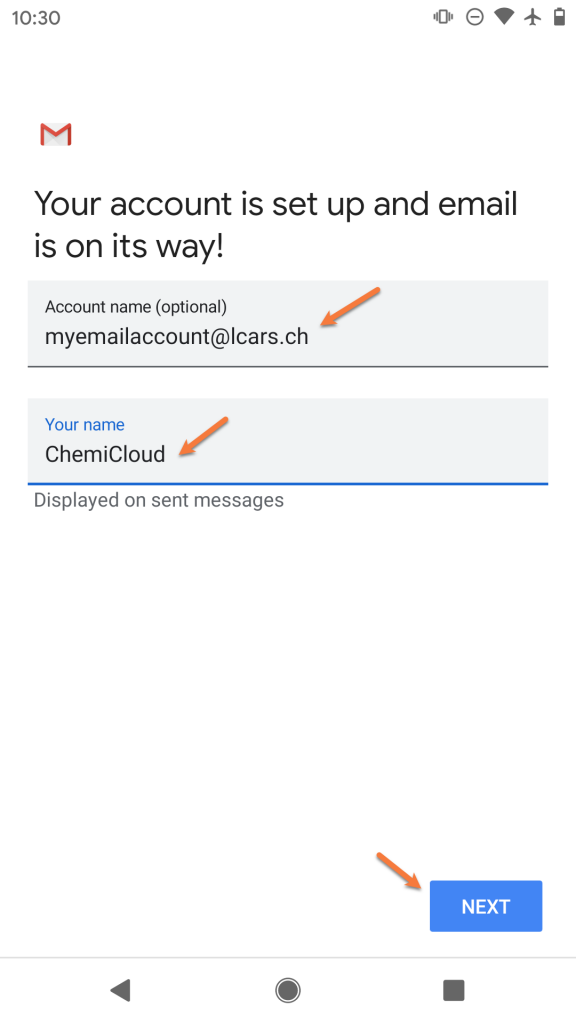
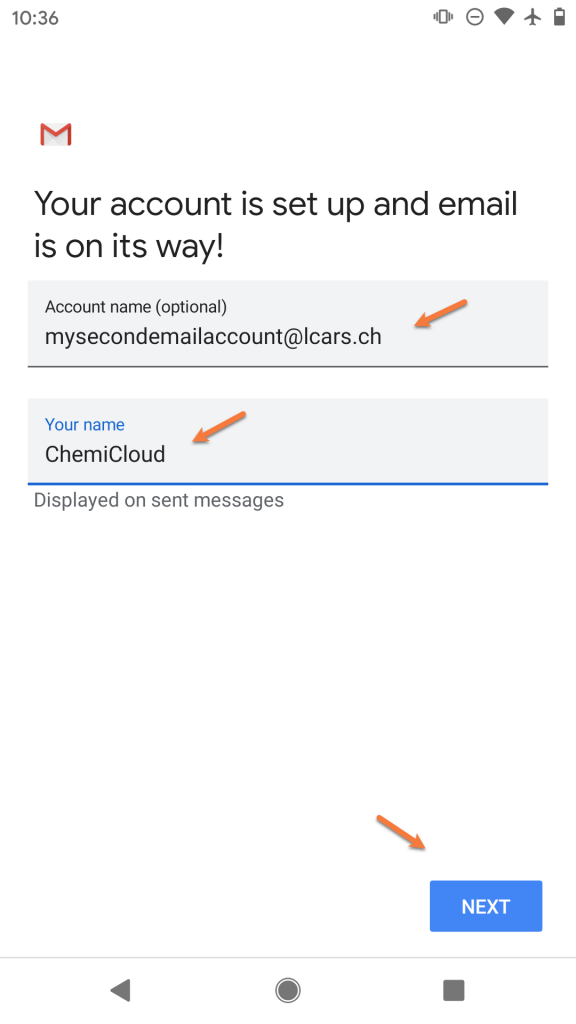
Step 11: On this screen, you can give the account a name, which is super useful if you have multiple email accounts setup in the Gmail App.
Under Your Name, ensure the name you want others to see when you send email on this device using the Gmail App is set appropriately.
Tap Next when ready.
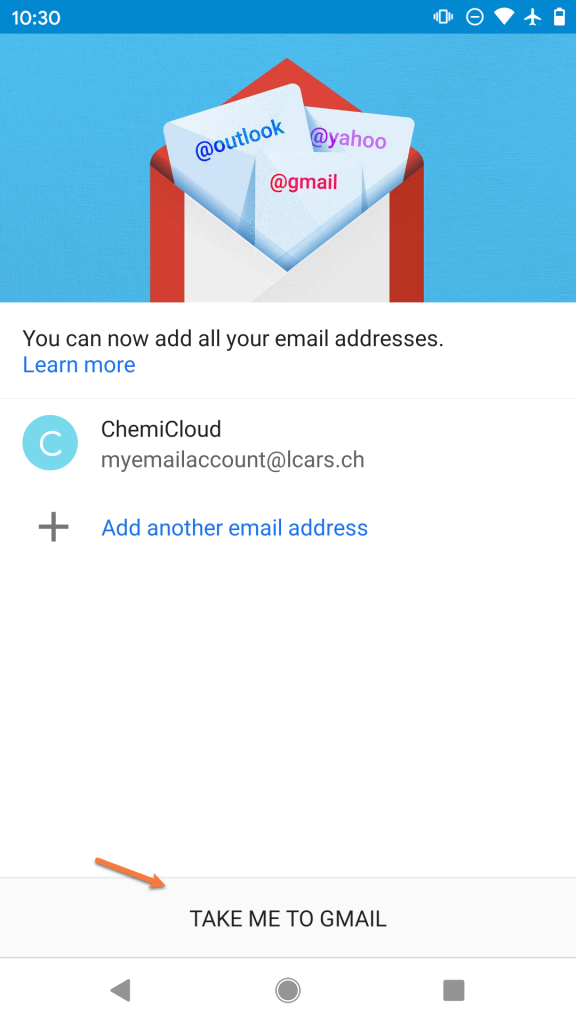
Step 12: That’s it! Not so bad right? If you want to add another email account, you can tap Add another email address or you can tap Take me to Gmail to finish.
Struggling with the Gmail mail client setup? ChemiCloud is the hosting solution designed to save you money and time! Check out our email hosting plans!
Adding additional accounts to Gmail on Android
As you can see from the final screenshot in the section above, you have the option to add additional accounts to Gmail back-to-back. However, let’s say you have already tapped the Take me to Gmail button, it’s been a couple weeks, and you need to add a new account. This section will cover how to add those additional accounts.
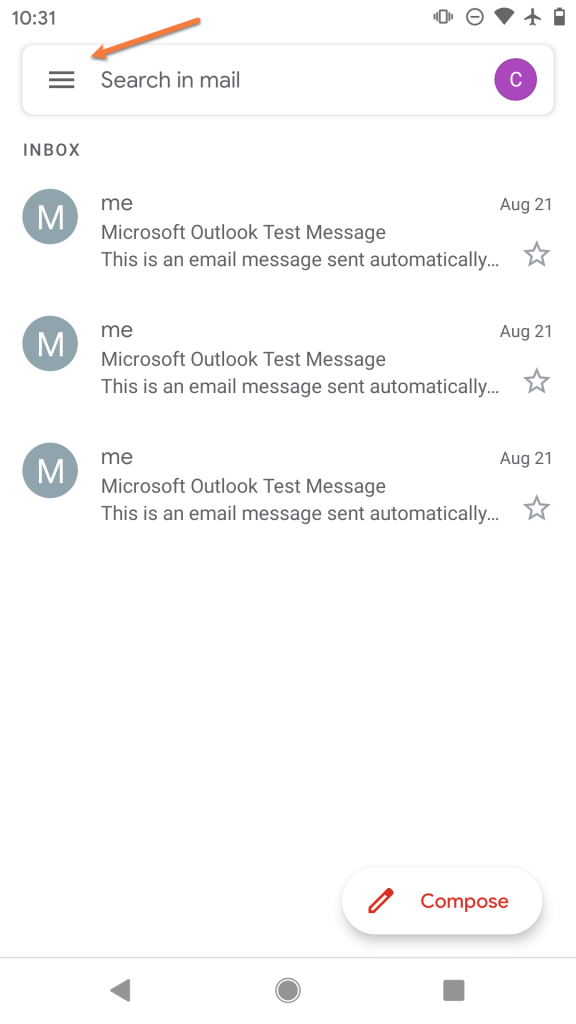
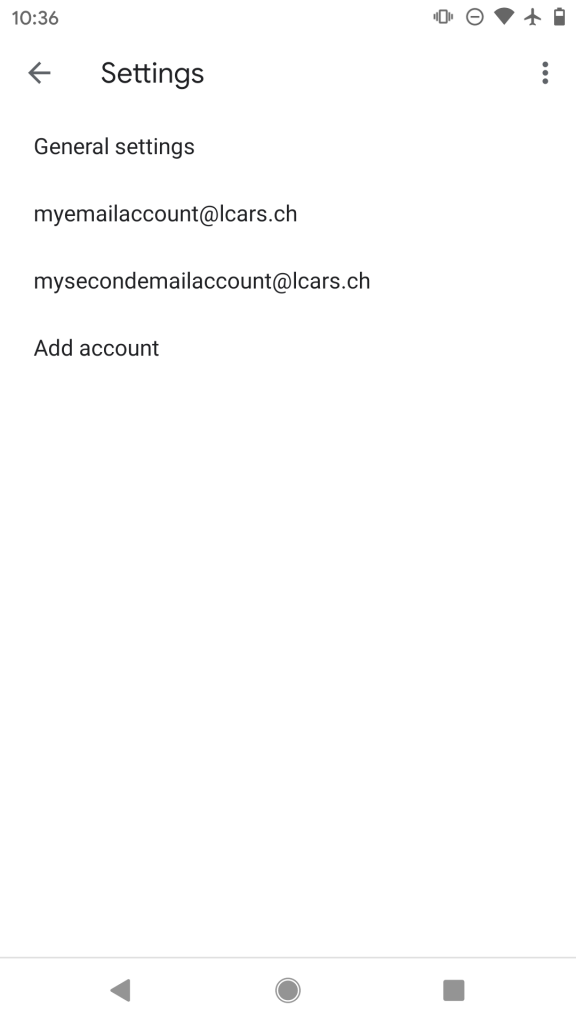
Step 1: Open Gmail and tap the ≡ icon (hamburger menu) in the top left to open the Settings panel.
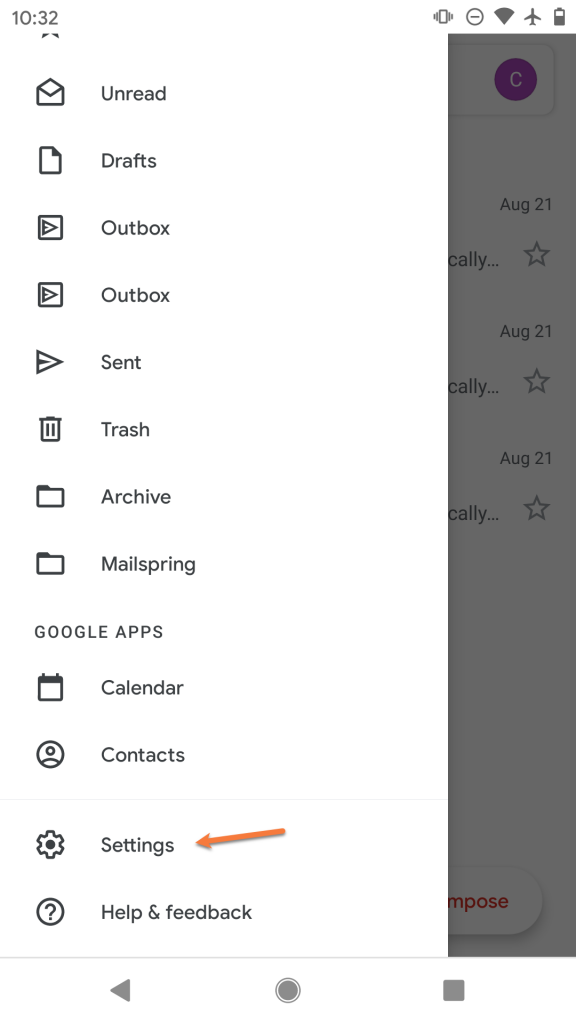
Step 2: Scroll down, if needed, and tap Settings.
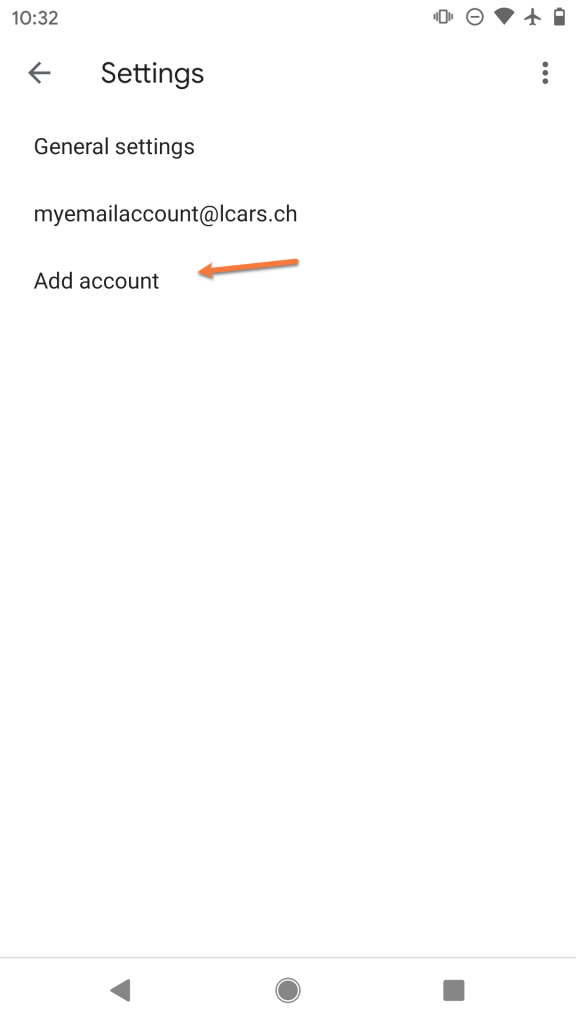
Step 3: Tap Add account
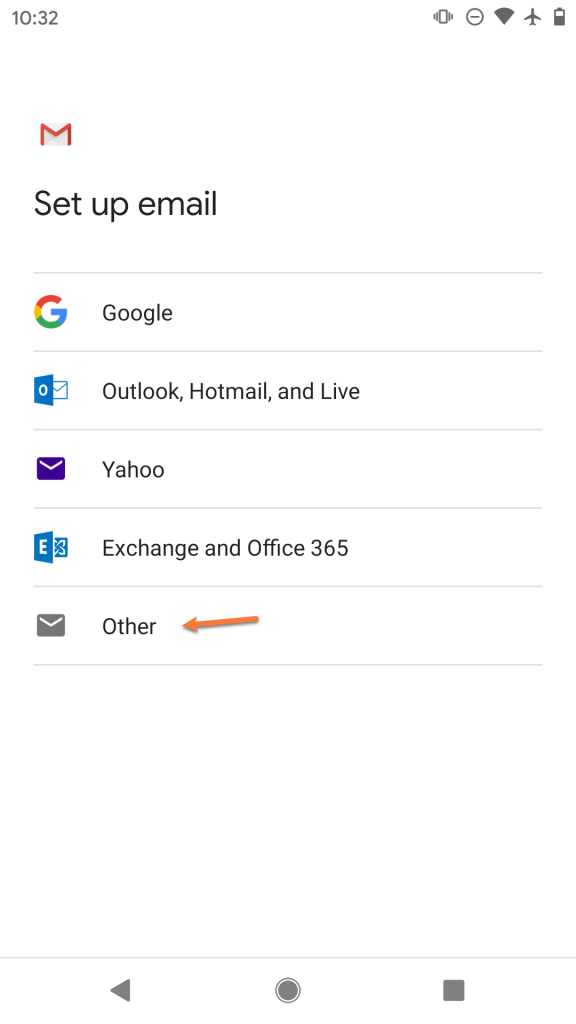
Step 4: Under the list of account types, select Other.
Step 5: Enter the full email address you are adding as [email protected]
Then tap Manual setup
Step 6: Select IMAP
Step 7: Enter the password for the account you are adding.
Then, tap Next

Step 8: On the next screen, ensure your Username and Password are filled in correctly.
In the Server section, enter your server information as mail.yourdomain.tld.
Then, tap Next.
Step 9: On the next screen, ensure the Require signin toggle is slid to the right. Also, check that your Username and Password are filled in correctly.
In the SMTP Server field, ensure the SMTP Server is set to mail.yourdomain.tld
Then, tap Next
Step 10: You’ll briefly see a screen saying Verifying Account Information and then, if the information you entered was correct, you’ll see a screen like the one below:
Feel free to change any of these settings, but leave Sync email for this account checked if you wish to be able to send/receive email on this device.
Tap Next when ready.
Step 11: On this screen, you can give the account a name, which is super useful if you have multiple email accounts setup in the Gmail App.
Under Your Name, ensure the name you want others to see when you send email on this device using the Gmail App is set appropriately.
Tap Next when ready.
Step 12: That’s it! You’ll be returned to the Accounts List page where you can add another account if you want.
We hope this was helpful! If you have any questions, feel free to leave a comment, open a ticket from your Client Area, or hit us up on Live Chat 24×7.
]]>
How to add your first email account to Mailspring
Step 1: Open Mailspring. This can be done by clicking the![]() logo in the bottom left corner of your taskbar on your keyboard type mailspring, then select Mailspring from the search results.
logo in the bottom left corner of your taskbar on your keyboard type mailspring, then select Mailspring from the search results.
The first time you open Mailspring, you’ll see this screen:

Click IMAP / SMTP.
Step 2: On the Add your IMAP account screen, enter your name, as you wish others to see it when you send mail from Mailspring, as well as the e-mail address and password for the account you’re adding.
Then click Continue.

Step 3: Mailspring will prompt you for the Incoming Mail (IMAP) and Outgoing Mail (SMTP) credentials:

Reviewing the options on the left side of this account setup screen:
Incoming Mail (IMAP) server should be mail.yourdomain.tld
Port should be set to 993
The security dropdown menu should have SSL / TLS selected
Do not check Allow insecure SSL
In username, enter the full username for the account you’re adding – [email protected]
In the password field, enter the password for this account.
Reviewing the options on the right side of this account setup screen:
Outgoing Mail (SMTP) server should be mail.yourdomain.tld
Port should be set to 465
Do not check Allow insecure SSL
In username, enter the full username for the account you’re adding – [email protected]
In the password field, enter the password for this account.
When you’ve completed the fields, click Connect Account.
Step 4: Mailspring will test the account & server settings you have provided. If the account details you have entered are correct, you will see this screen:

One of the key features in Mailspring is it’s customization features. On the screen above, you can select a layout of the reading pane as well as a set of keyboard shortcuts you might be familiar with, such as those used in Outlook or Gmail.
Once you’ve made your decision, click Looks Good! to finish.
And that’s it! Now you know how to add an IMAP account to Mailspring!
Struggling with the Mailspring mail setup? ChemiCloud is the hosting solution designed to save you money and time! Check out our email hosting plans!
Adding additional IMAP accounts to Mailspring
Adding extra accounts to Mailspring is pretty easy, but keep in mind the free version of Mailspring currently limits you to 4 accounts total.
Step 1: From the Mailscreen main page, click the ≡ icon (hamburger menu) in the top right corner of Mailspring, just below the X button.

Step 2: In the menu that appears, click Add Account.

Step 3: The Connect an email account screen appears, just like the first time you added an account to Mailspring.
Select IMAP / SMTP to continue.
Step 4: Mailspring will prompt you for the Incoming Mail (IMAP) and Outgoing Mail (SMTP) credentials:

Reviewing the options on the left side of this account setup screen:
Incoming Mail (IMAP) server should be mail.yourdomain.tld
Port should be set to 993
The security dropdown menu should have SSL / TLS selected
Do not check Allow insecure SSL
In username, enter the full username for the account you’re adding – [email protected]
In the password field, enter the password for this account.
Reviewing the options on the right side of this account setup screen:
Outgoing Mail (SMTP) server should be mail.yourdomain.tld
Port should be set to 465
Do not check Allow insecure SSL
In username, enter the full username for the account you’re adding – [email protected]
In the password field, enter the password for this account.
When you’ve completed the fields, click Connect Account.
Step 5: Mailspring will test the account & server settings you have provided. If the account details you have entered are correct, you will be taken to the main Mailspring page where you can see both accounts.

And that’s it! Now you know how to add an additional account to Mailspring!