In this KB article, we will cover how to whitelist or blacklist a sender in the SpamExperts Control Panel.
How to Whitelist a Sender in SpamExperts
Step 1: Log in to your SpamExperts Dashboard.
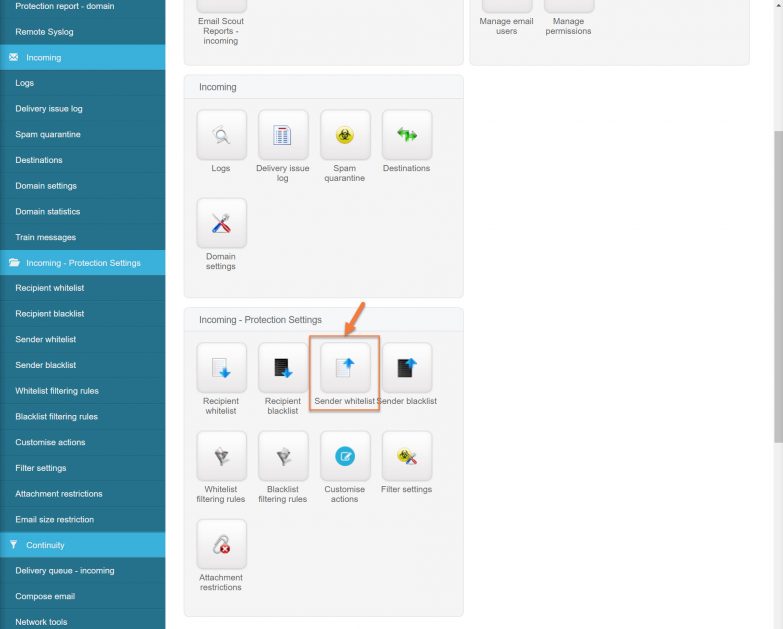
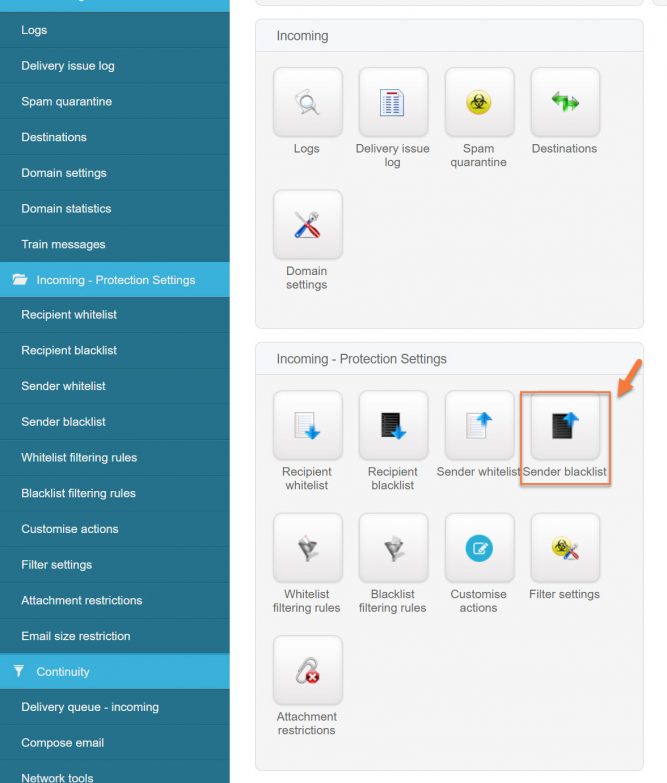
Step 2: Beneath Incoming – Protection Settings, click Sender Whitelist.
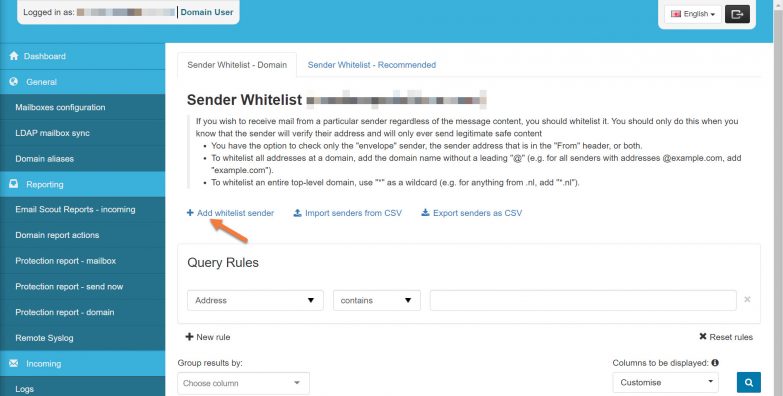
Step 3: Click the link + Add whitelist sender to open the Whitelist Sender modal.
Step 4: In the whitelist modal, you have a few options. Let’s examine them:
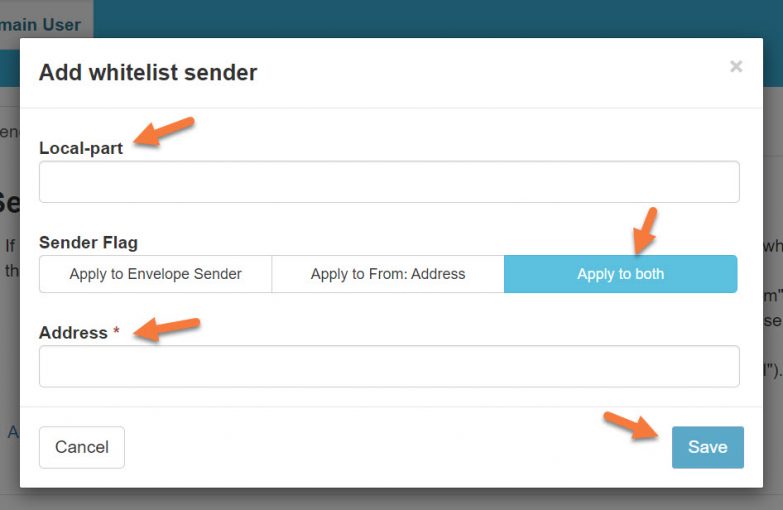
In Local-part is how SpamExperts refers to the username, or the part before the @ sign.
Sender Flag refers to the portion in the headers of the e-mail that will be used to identify the sender for this rule to take effect.
The address is the portion after the @ sign or the domain name.
For our example, we’ll use the following configuration:
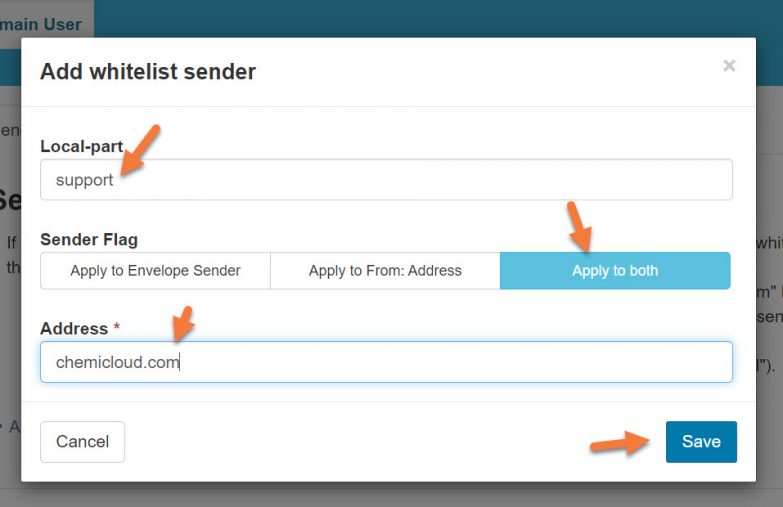
This configuration will whitelist all the emails coming from any @chemicloud.com e-mail address sent to [email protected] using both the Envelope Sender and From: address, giving the best chance for the rule to catch the messages.
You can also whitelist individual senders, just replace chemicloud.com with the email [at] chemicloud.com
Click Save to save the rule.
How to Blacklist a Sender in SpamExperts
Step 1: Log in to your SpamExperts Dashboard.
Step 2: Beneath Incoming – Protection Settings, click Sender Blacklist.
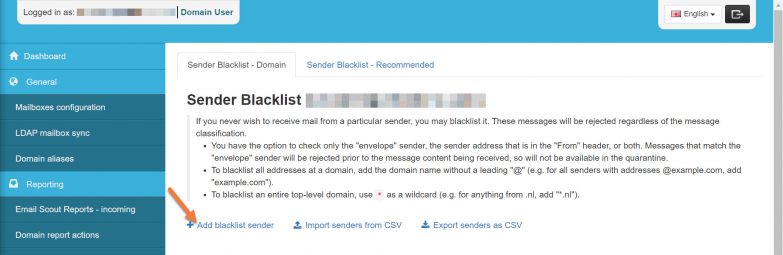
Step 3: Click the link + Add blacklist sender to open the Add Sender to Blacklist modal.
Step 4: In the blacklist modal, you have a few options. Let’s examine them:
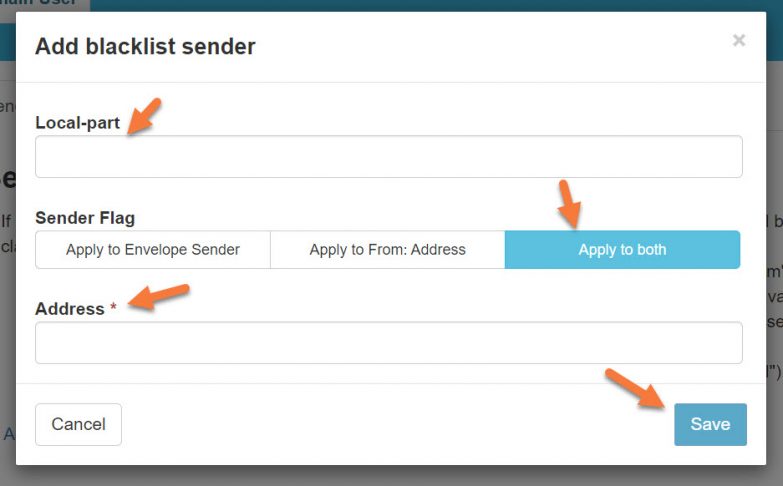
Local-part is how SpamExperts refers to the username, or the part before the @ sign.
Sender Flag refers to the portion in the headers of the e-mail that will be used to identify the sender for this rule to take effect.
Address is the portion after the @ sign or the domain name.
For our example, we’ll use the following configuration:

This configuration will blacklist all the emails sent to [email protected] from any email account created under chemicloud.com using both the Envelope Sender and From: address, giving the best chance for the rule to catch the messages.
You can also specify individual email account which you want to block, instead of entering the domain chemicloud.com, enter the email address like [email protected]
Click Save to save the rule.
Now, when an email from chemicloud.com is sent to support@ yourdomain.com using this SpamExperts configuration, it 100% will be blocked and not delivered anywhere, not even to spam. This makes us sad, don’t block us!
And that’s how you whitelist and blacklist a domain / email address in Spam Experts!
]]>How to access the SpamExperts dashboard through your Client Area
- Log in to your Client Area.
- While you are in your dashboard, scroll down the page to the bottom.
- Under Manage Your Email, choose the domain associated to SpamExperts service.
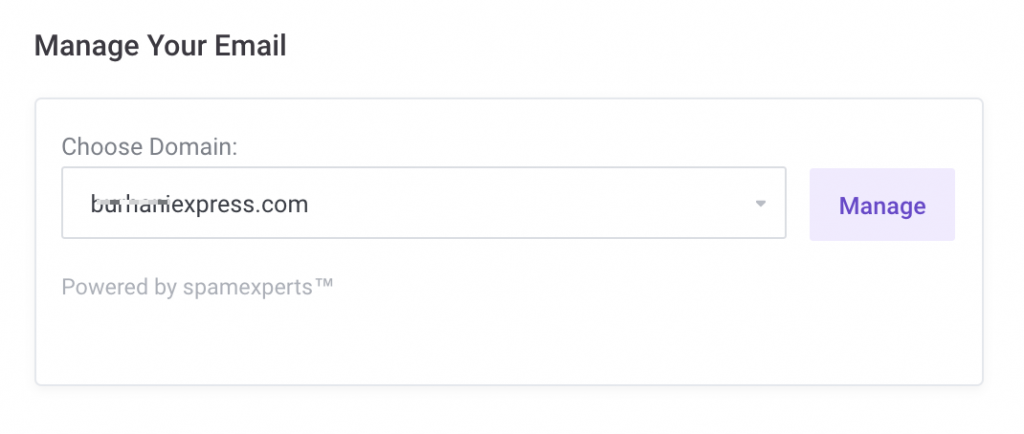
- Click the Manage button. A new window will open and you will be logged in to your SpamExperts account.
That’s it. Now you know how to access your SpamExperts Dashboard from your ChemiCloud account.
How to access the SpamExperts dashboard without access through your Client Area
This method will help you to provide with access to SpamExperts dashboard to one of your customers, without providing them with access to your ChemiCloud account, or doing any reference to us.
- First, you will have to access SpamExperts through your ChemiCloud account, as described above.
- Once you are logged in, scroll down the page and look up for My Settings in the menu and click on ‘User’s profile‘
- Under ‘User’s profile’ area you will have to set an email address that you own and a strong password (you can use a password generator).

4. Save the changes
Once you have set the email address and the password, you can always log in directly at http://master.antispamcloud.com using your domain name and your password.
That’s it. Now you know how to access your SpamExperts Dashboard without direct access through your ChemiCloud account.